Have you ever wanted to create stunning popups in your WordPress site using Elementor? Popups are a great way to get more subscribers and leads.
One of the most highly requested features for Elementor, one that is often overlooked when users install it, and one that rarely gets utilized to its fullest potential is the ability to create popups within Elementor.
While you can create a popup using plugins, it is not 100% necessary. Since you already have WordPress installed and running, all you need to do is to utilize the Elementor page builder that uses a simple drag-and-drop interface to build WordPress pages or posts.
In this tutorial, we are going to learn how to create a popup in the Elementor WordPress plugin. It is a very simple and easy tutorial but it can be really useful for you if you need to make any kind of alert for your website visitors.
Popup In Elementor
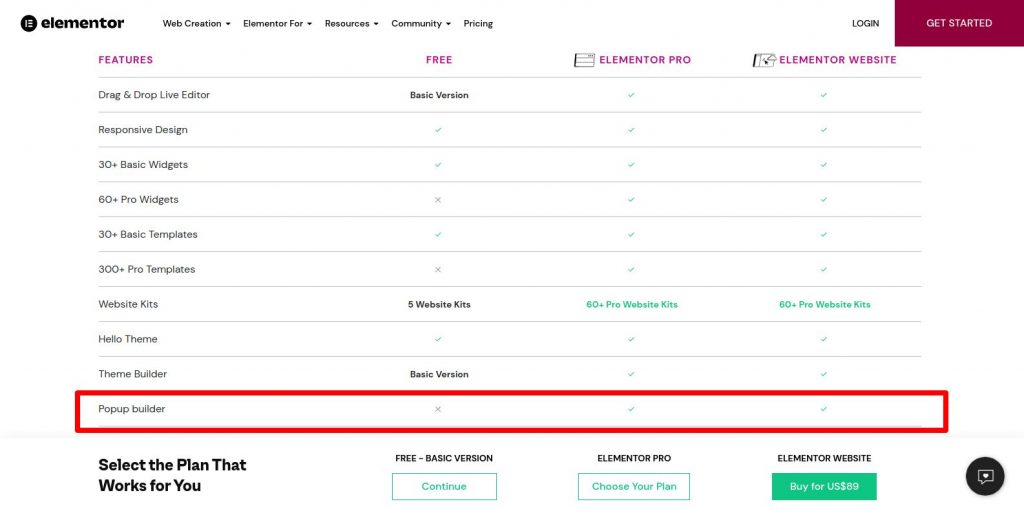
Creating popup modals in Elementor is a paid feature. You need to have an Elementor Pro subscription to create some amazing popups that will be helpful to convert your website visitors into subscribers or registered users.
We recommend Elementor pro to all our clients as it is easier to create stunning designs with it. And easy to maintain the content on the website. Whether it is a good practice or not is a discussion for some other day.
When you have an Elementor Pro plugin installed on your WordPress website alongside the free version, it is still not easy to find the popups option.
This is because the popups feature of Elementor is not a widget but a separate feature.
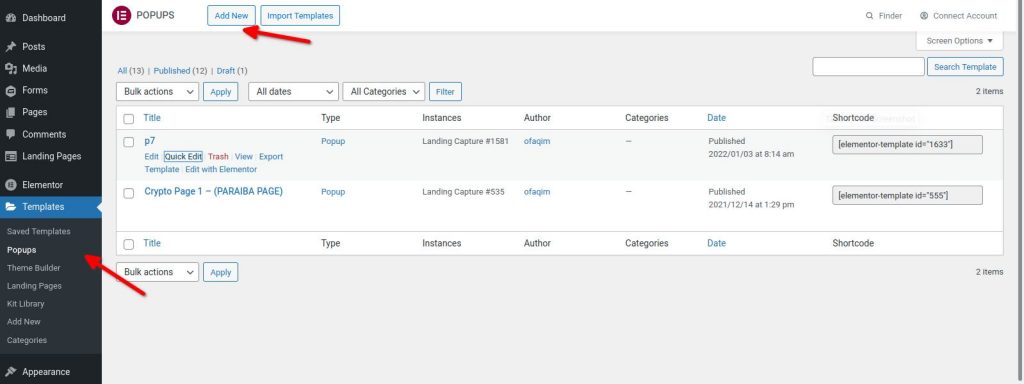
To create popups, go to your WordPress Dashboard > Templates > Popups page.
Press the Add New button. Put the popup name and press the Publish button in the right column.
Once published, you will be able to see the Edit with Elementor button on top of the same page. Click on it and start creating your first popup modal in Elementor builder.
Elementor Popup Conditions
When you finish creating your first popup with Elementor, you should press the Publish button. You will then see a popup from Elementor that requires how and where the newly create popup is to be used.
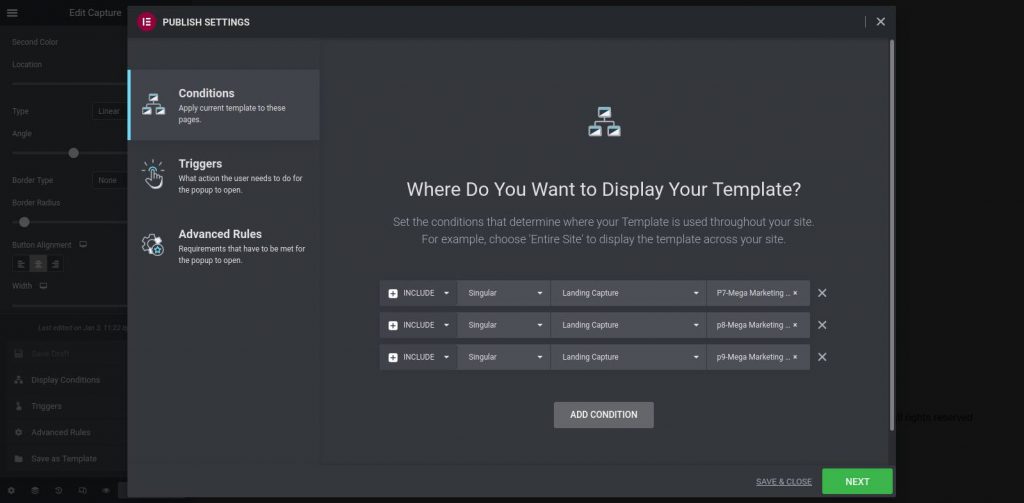
In the popup publish settings, you should first select the conditions.
Select where the popup you are creating has to be displayed. Popups in Elementor can be created for the complete website or just some sections of it.
Once the conditions are set, press the Next button.
Here you will be asked for different kinds of triggers that can be used to trigger the popup modal that you are creating using Elementor. Very important and useful setting.
Here you can set the popup to show only once when loading the website page. Or show the Elementor popup when hovering over a certain item. Or show when the visitor is going to close the browser tab.
Trigger Elementor Popup On Button Or Link Click
When publishing a popup with Elementor page builder, you will see conditions and triggers in its settings. But for some reason, there is no option to trigger a popup when clicked on a button or a link.
This feature can also be done but unfortunately, Elementor doesn't have an easy way to do this.
To trigger a popup modal when a button is clicked on a page, you have to first set a CSS ID or Class name to the button.
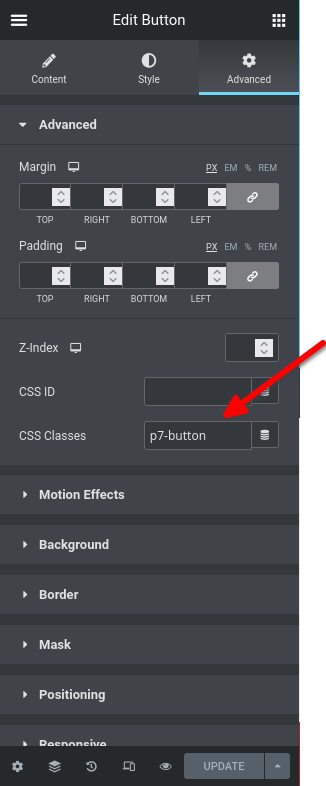
Now that we have named a CSS class to the button, remember and copy this name.
For the same button settings, go to the Content tab on top. Find the Link field and put the CSS class name here with “#” in the beginning.
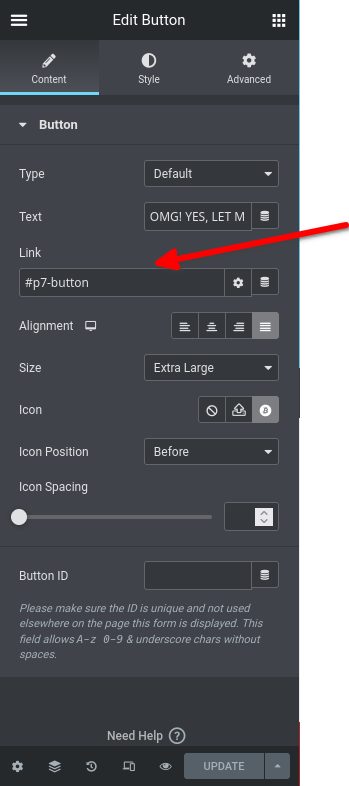
This is important as we will be using this CSS class name and link name in the popup settings next.
Now go to your Popup Settings in Elementor. This can be found by clicking the gear icon at the low end of the Elementor page builder.
Now go to the Advanced tab from the top and find the Open By Selector field.
Here input this shortcode with your CSS class name:
a[href="#your-css-class-name"]Now your Elementor popup modal will open whenever someone clicks the button with this CSS class name.
If you are using this same popup on different pages for different buttons, follow the same steps above. In the Open By Selector field you should enter multiple times the above shortcode like this:
a[href="#your-css-class-name-1"], a[href="#your-css-class-name-2"], a[href="#your-css-class-name-3"]The comma and space will help the Elementor plugin to know that it should trigger this popup for multiple buttons.
This way you will be able to create a popup in the Elementor Pro plugin when someone clicks a button. Similarly, you can do this for a text link.
Trigger a popup on a page when someone clicks on a link by putting the link URL as #random-link-name
Then go to the Popup Settings page and follow the same steps above to put the link in the Open By Selector field.
Similarly, you can create an Elementor popup to trigger when someone clicks on the menu. Just name the menu with a unique CSS class name and follow the above steps.
Using small size images in popups helps load them faster. Read our blog post to get Free Image Size Reduction Trick and get images that are easy and fast to load in a popup.
Elementor Popup Entrance and Exit Animation
Creating popups in Elementor can be confusing sometimes. When you want to make the animations for the popup, there are two places that can confuse you.
When you edit the main section of the popup and go into its Advanced tab, under the Motion Effects tab, there is also an Entrance Animation option.
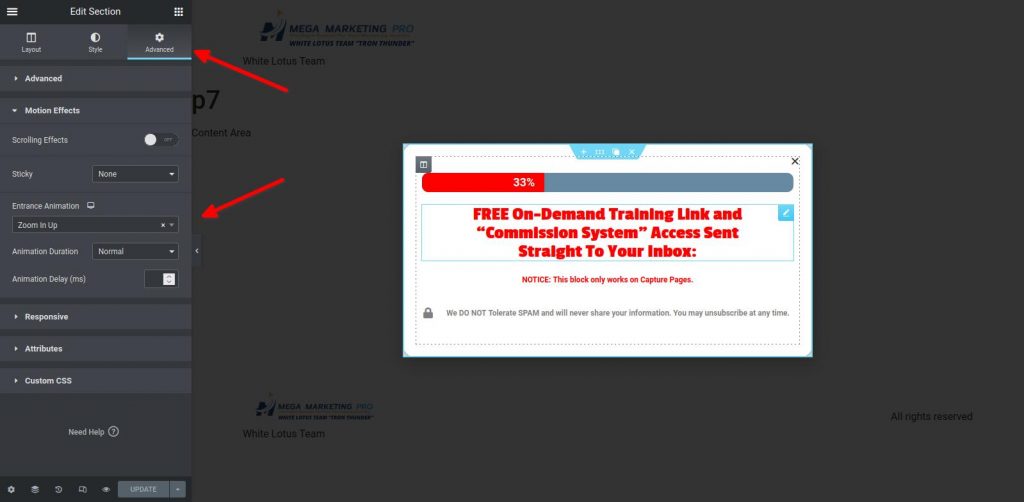
Do not confuse this with the complete popup animation. This setting should not be set.
The right setting is in the Popup Settings panel. This panel can be accessed by clicking the gear icon in the Elementor page builder panel for popups.
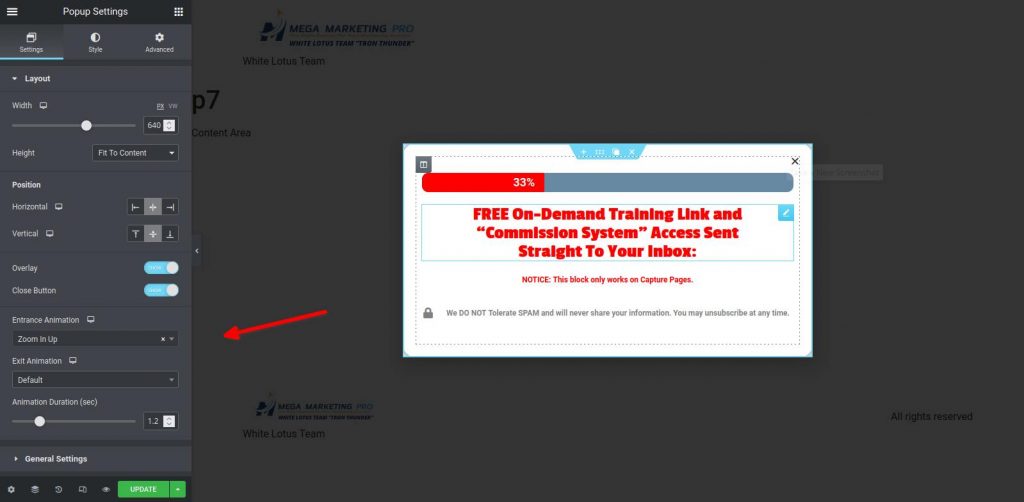
Here you should set the type of Entrance and Exit animation for your popups.
Elementor Popups Rounded Borders
One of the attractive features of a popup is its borders. Based on the design they can be sharp or rounded.
When you want to have a rounded bordered popup, again it can be confusing in Elementor as to where to put the right setting.
Because the Border option is seen in almost all elements and widgets of Elementor.
To set the right Border settings, go again in the Popup Settings panel by clicking on the gear icon in the left bottom corner of the Elementor panel.
Then click on the Style tab.

In the Popup tab, you will see the Border Radius option. Input your numbers here and get rounded border popup modals in Elementor.
Elementor Change Popup Conditions
When you publish your popup first time in Elementor, it asks for various publishing settings options. But when you want to change the popup conditions again, it is again confusing for a new Elementor user to find this setting.
To change the popup conditions in Elementor, you have to click on the upper arrow icon button beside the Update button.
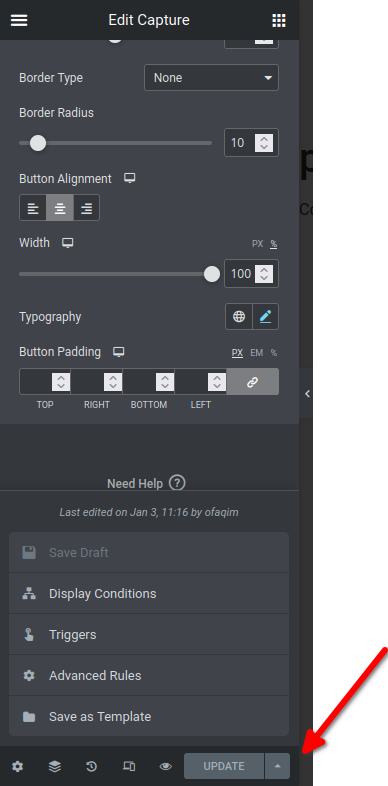
When you click on this small button, you will see the Display Conditions, Triggers, and Advanced Rules panel link as a list.
In my view, these settings should be more visible and easily accessible. Something that Elementor can improve in their future updates.
Final Words
In the above tutorial, we saw how to create Elementor popup templates to be used on your website. We specifically saw a unique case of a button trigger to the Elementor popup.
This part is confusing for many WordPress Elementor designers. Keep this guide as a reference by bookmarking our website.
Elementor popup settings can be confusing at times. But they can be used to create some advanced popups like Elementor popups with dynamic content.
Plus I have found Elementor popups are mobile friendly too. And custom mobile popup designs can also be made with the Elementor Pro plugin.
If you have a special trick with the Elementor Pro plugin when creating popups modal, do share them in the comments below.

