Are you running your WordPress website on shared hosting or VPS that is not performing well? Want to move your WordPress website to a better and reliable hosting provider?
There are many good hosting solutions providers on the internet. Our favorite is Amazon Web Services also popularly known as AWS. The team behind the AWS is very supportive and treats you well when you need them.
The best thing we like about AWS is its billing and reliability. The prices are very pocket-friendly for small to medium size websites. You don't have to break the bank to pay your website hosting bills.
The reliability of AWS servers is super amazing. You will be amazed at how well they perform. And if structured properly by using different services like RDS, VPC, etc., you can create a highly available website worldwide.
So today we are migrating a website from AWS EC2 to Lightsail on AWS itself. We are doing this as EC2 servers need a little more managing time than Lightsail servers. Other than that there is no reason for us to move away from EC2 servers.
Setting Up AWS Lightsail Server For WordPress Website
Starting up and maintaining a Lightsail server is much easier than EC2 servers. It is the same as maintaining a dedicated server and a virtual server. Here EC2 servers are like dedicated servers. And Lightsail servers are like VPS's.
1. Log into your AWS account and press the Create Instance button.
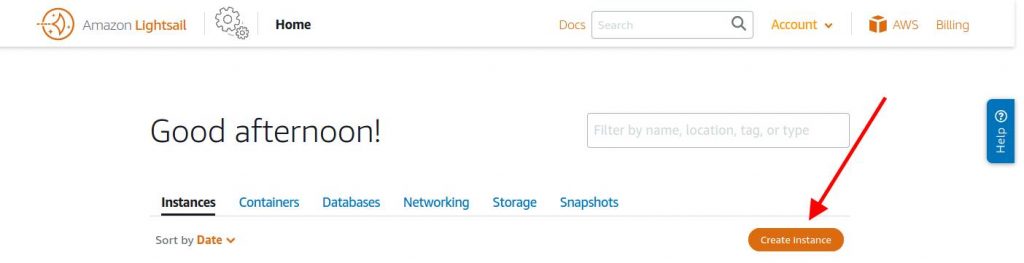
This will lead you to the new instance settings page. Here you can select the instance location, platform, instance plan, and name the instance.
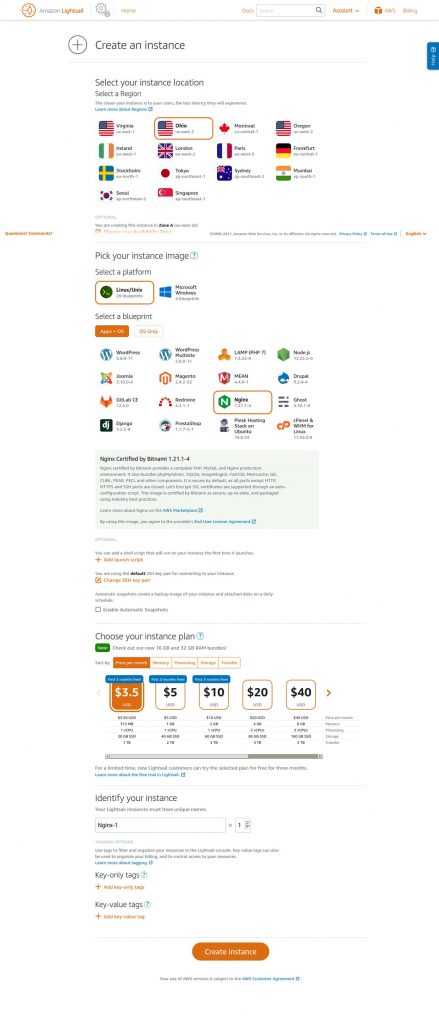
2. Select Server Location
We are selecting Ohio-2 as our server location as we found that this location has a little more redundancy than other locations.
3. Server Platform Selection
Next is selecting the platform for the server. This is the OS you want on your server. We recommend going with Linux as it is the most widely used server worldwide. Plus lots of customizable opportunities with it.
In the instance image section, you can directly go with WordPress or WordPress multisite instance. This will create a WordPress website with Apache as its process handler along with PHP and MySql.
In our experience, Apache performed not so well for high-traffic websites. So we are going with the Nginx blueprint.
4. Select A Blueprint
In this Nginx blueprint, you get Nginx certified by Bitnami with a complete PHP, MySQL, and Nginx production environment. It also comes with phpMyAdmin, SQLite, Memcache, and other such features that will help us optimize our WordPress website for better performance as the traffic increases.
5. Instance Plan
Now select the right instance plan you think will be right for your website. If it is a small website just starting up, go with the basic plan of $3.5 monthly. Here you get 512MB RAM, 1 vCPU, 20 GB SSD, 1 TB bandwidth monthly.
If the website you are making or migrating already has a good amount of traffic between 10,000 to 100,000 page views monthly then going with a $5 or $10 website plan will be a better choice. Select the plan based on your website traffic.
6. Instance Name
Last but not least is naming your instance. This is to identify your instance with a unique name.
7. Create AWS Lightsail Instance
Now give the AWS Lightsail a few minutes of time until it creates your selected configuration instance. This should take 5 – 10 minutes.
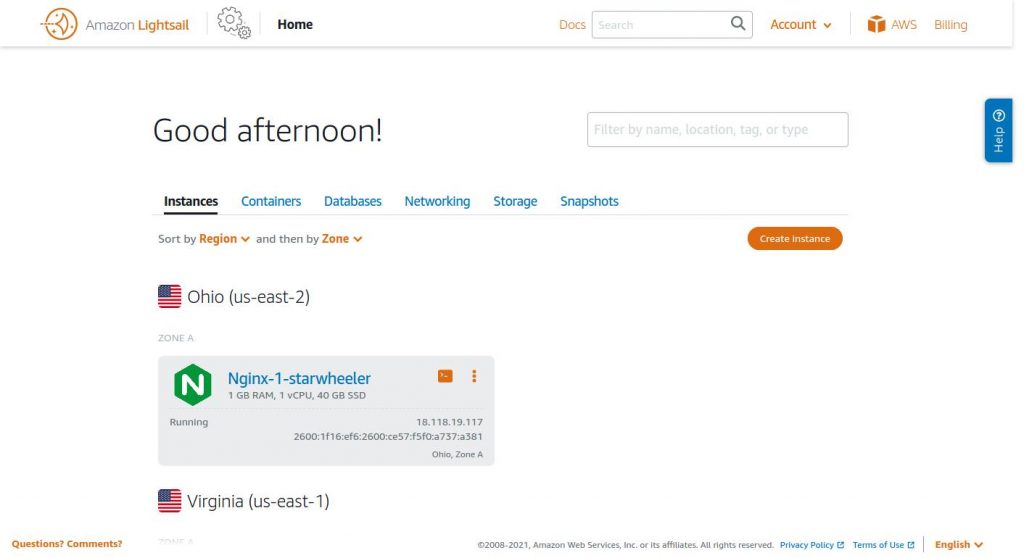
Clicking on your instance will take you to the instance details page where you will find Stop and Reboot buttons as well. Public IP and all other details required.
The best part we like about Lightsail servers is that you can connect to the instance by SSH from the browser itself.
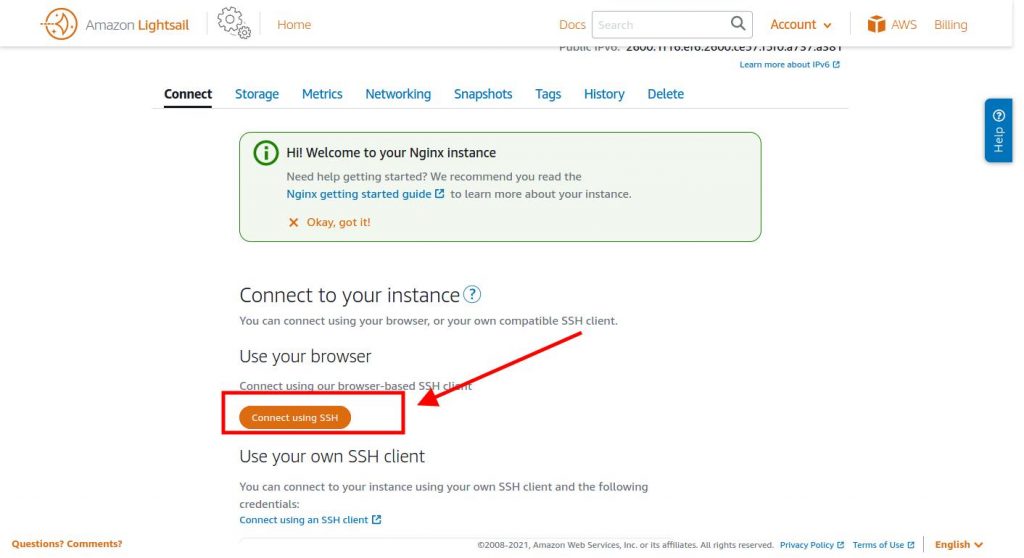
On the Instance details page when you scroll down you will see a button named Connect using SSH. This button will directly take you inside the instance command line.
You will not need to use it much apart from updating your OS once in a while.
But if you need to configure other parts of Nginx, PHP, and MySQL apart from the default configurations then this feature of AWS Lightsail for the WordPress website will come in handy.
For this tutorial, we are going with the default settings of the AWS Lightsail with Nginx image settings.
8. Setting Static IP For Lightsail Instance in AWS
The next very important step is to set a static IP for your instance. Go to the Networking tab on the instance details page.
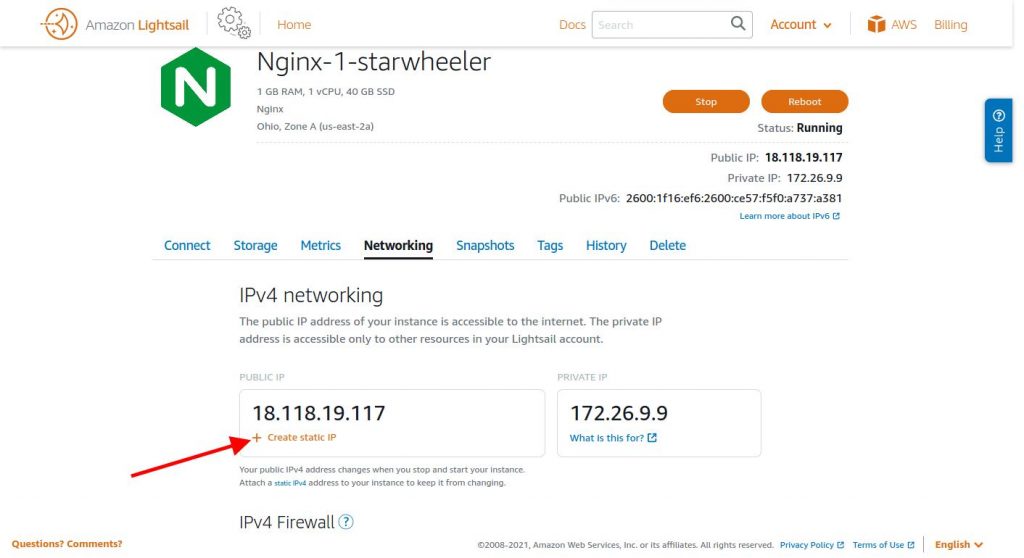
The public IP shown is a temporary IP or dynamic IP that will change if ever you stop or reboot your instance. To prevent this we will create a static IP for this instance.
Click on the Create static IP link. This will redirect you to the Static IP settings page.
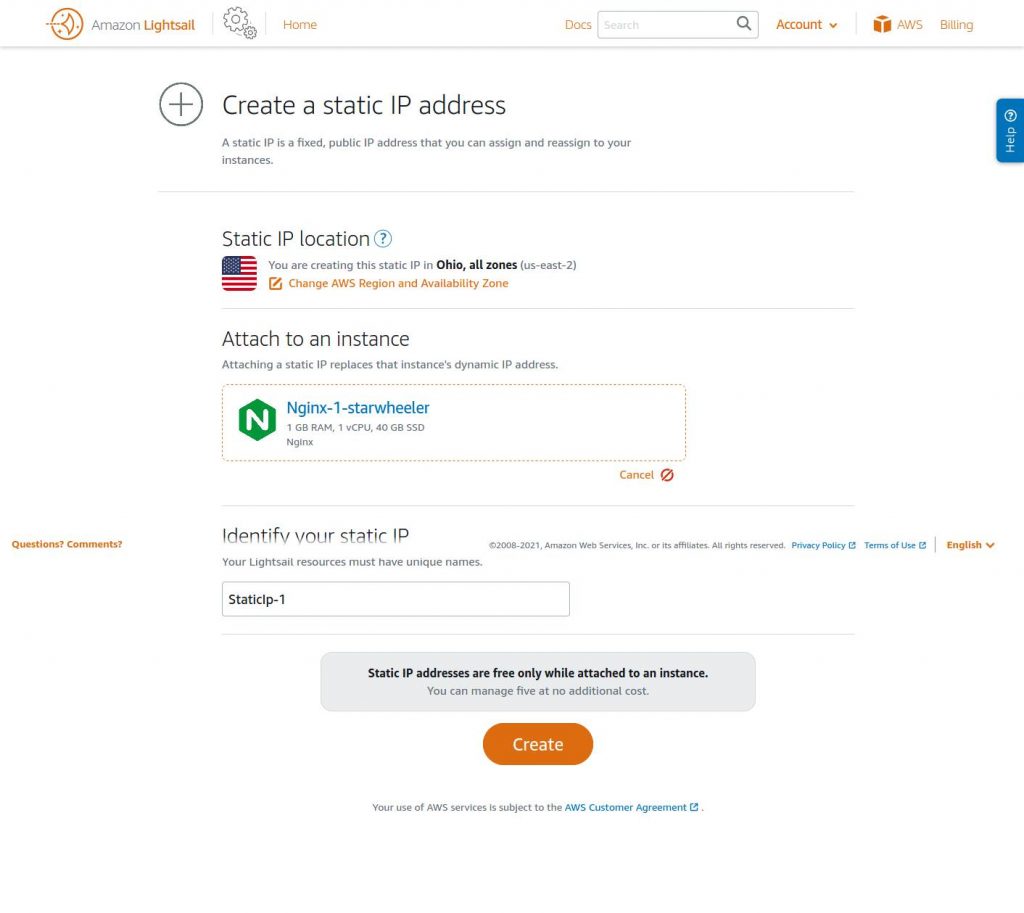
Give a unique name for identifying your static IP.
Press the Create button. This will create a unique static IP that will be attached to your Lighstail instance forever as long as this instance is live.
Another important step is to have a snapshot backup for your website. Amazon web services offer to make automatic snapshots for Lightsail instances.
9. Set Regular Backups For AWS Lightsail
Go to your instance details page and find the Snapshots tab.
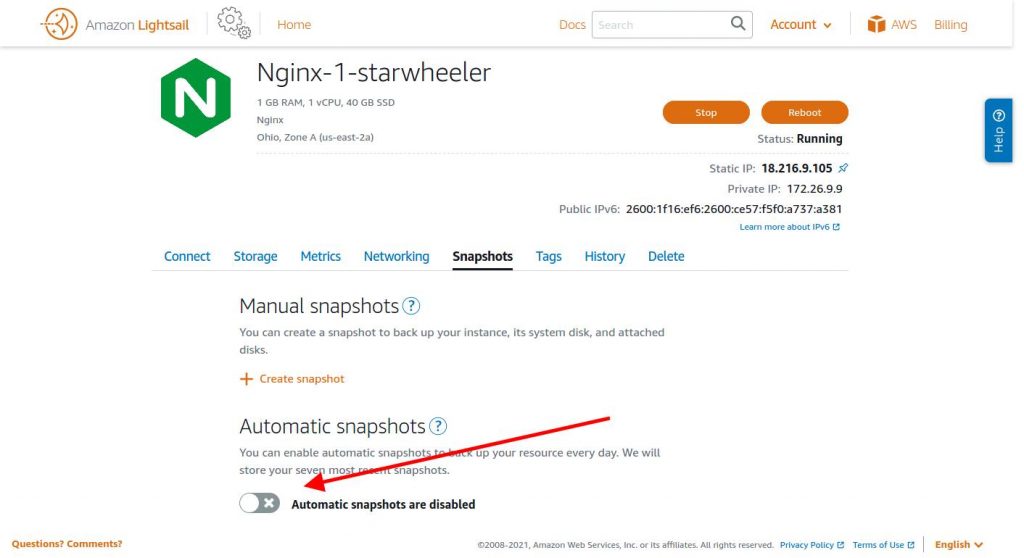
Enable the Automatic Snapshots option. This will create automatic snapshots for 7 days for your instance.
This feature comes in very handy when your website is hacked or affected by malware. We recently wrote about one such situation here: https://underwp.com/wordpress-hacked-redirect-fix-2021/
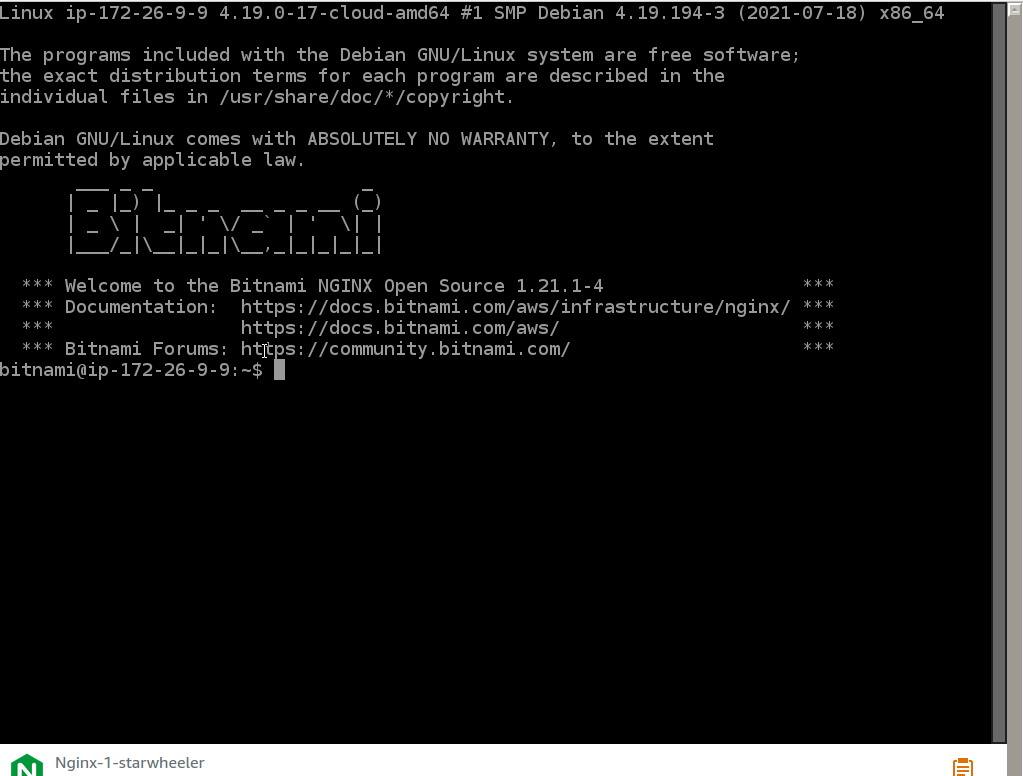
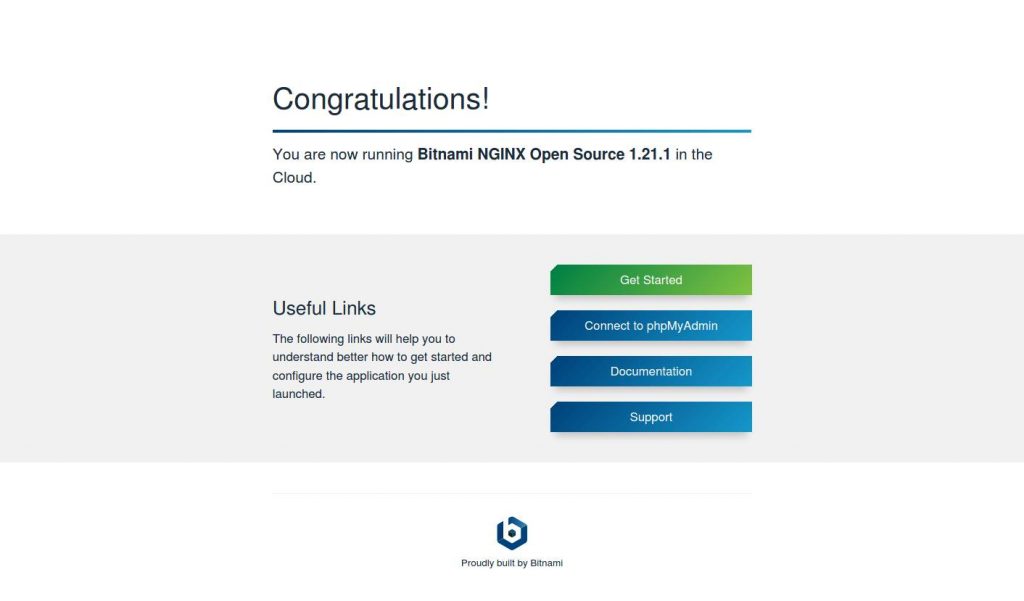
To check if everything is alright, just type your public IP in your browser and you should be able to see a page like this:
From here on the job of AWS Lightsail is done. Now it's time for us to pull up our sleeves and install WordPress on it in our customized way.
We will do this now in the next part of this series. We will be building a blank WordPress website with top page speed scores. Then we will move to migrate our old website to this new website manually.
If you do not want to have a customized hosting platform for your WordPress website then check our post here: https://underwp.com/install-and-manage-wordpress-with-nginx-and-php-fpm-on-aws-ec2-micro-instance/
In the above link, you will see how we built a WordPress website the easiest way using WordOps. This is also a good way to manage your WordPress website with updates in its hosting technologies.
Do check out our other parts of this series to get yourself a robust and high-performance website.
If you like this post, please comment and share this post to keep us motivated.
Read the other parts:
- Migrating WordPress Website To Lightsail On AWS – Part 2
- Migrating WordPress Website To Lightsail On AWS – Part 3
- Migrating WordPress Website To Lightsail On AWS – Part 4