The advantage of using a WordPress website is that it can handle small blogs to big e-commerce platforms in itself. If you have any business idea, it most probably can be built on WordPress with the right tools and coding.
But when you want to change your host and move your WordPress website to a new hosting or a better server architecture, then it can be a very daunting task. This is why we have written this series of posts to give you the best possible website hosting architecture using Amazon Web Services.
So far we have seen in part 1 of this series how to set up your AWS Lightsail server with Nginx, PHP, and MySQL.
In part 2 of this series, we have set up the environment for WordPress on Lighsail VPS. We installed a brand new WordPress site on it.
Now in this part, we are moving our old website from AWS EC2 servers to AWS Lightsail server. This is being done only because Lighsail servers are easier to manage than AWS EC2 servers.
Setup Right IPv4 address In Cloudflare
In the previous tutorial, we ended up installing a new WordPress website. We did this by changing the IPv4 address in the Cloudflare dashboard.
When you change the IP address of your website to a new server, your old website might not show up. This is not helpful when you haven't backed up your website yet.
So to back up, your old website, go to your Cloudflare dashboard again and change the IPv4 address of the A value of your website in the DNS tab to the old hosting IP. We have done this in the previous part-2 of this series. Please refer to it again if you have any doubts about how to do it.
Backing Up WordPress Website For Migration To AWS Servers
Before we start backing up the WordPress website that we want to move, there are a few important points to check. These points help in the easy transfer of the WordPress website.
1. Update WordPress
As you saw in the previous part 2 of this series that we have installed a fresh website of WordPress on our AWS Lightsail server. Now we need to make sure the present WordPress website that we are transferring to be of the latest version of WordPress too.
Go to your WordPress Dashboard > Updates.

As you can see that our WordPress website has 21 updates. These updates include both WordPress, Plugins, and theme updates.
Before updating plugins, it is recommended to update your WordPress.
2. Update Plugins
Once you update your WordPress website, it is now time to update your plugins. These plugins can be free or premium.
You can update your plugins from two places. One is from the Dashboard > Updates section.
The second is by going to the plugins page directly. This is seen in the left menu whenever you login into the WordPress admin dashboard.
We recommend the second way of updating your plugins. We have usually found that this is the safer way of updating plugins. If any errors happen like an Error establishing a database connection
You can fix these errors immediately when you update your plugins one after the other from the Plugins settings page.
3. Update Themes
The last but still important part of updating your WordPress website is to update its theme. This is also done from the WordPress admin dashboard.
Go to Appearance > Themes. You should be able to see the latest updates of your WordPress theme there. If there is any, update it immediately.
Most of the WordPress themes update regularly to fix any bugs or critical issues. Keeping your WordPress theme updated is an important part of any WordPress website whether you are migrating it or not.
4. Cleaning WordPress Database
You can start backing up your website immediately after the three steps above. But if you want to keep it cleaner and get a well-optimized backup for your website then cleaning your WordPress database before you move is a good step.
Cleaning the WordPress database can be done in multiple ways. There are manual and plugin ways to do it. For this post, we are going the plugin way.
If you want to learn about cleaning databases manually, comment below on this post and we will write up a tutorial for it too.
We like two plugins for cleaning our WordPress database, WP-Optimize, and Litespeed cache.
Both of these plugins have a good way of cleaning your WordPress website database in a safe way. For this tutorial, we are using the WP-Optimize plugin.
If you are not using this plugin, we suggest you install it from the WordPress repository. It is a free plugin.
After installing the WP-Optimize plugin, go to its settings page by clicking on its submenu WP-Optimize.
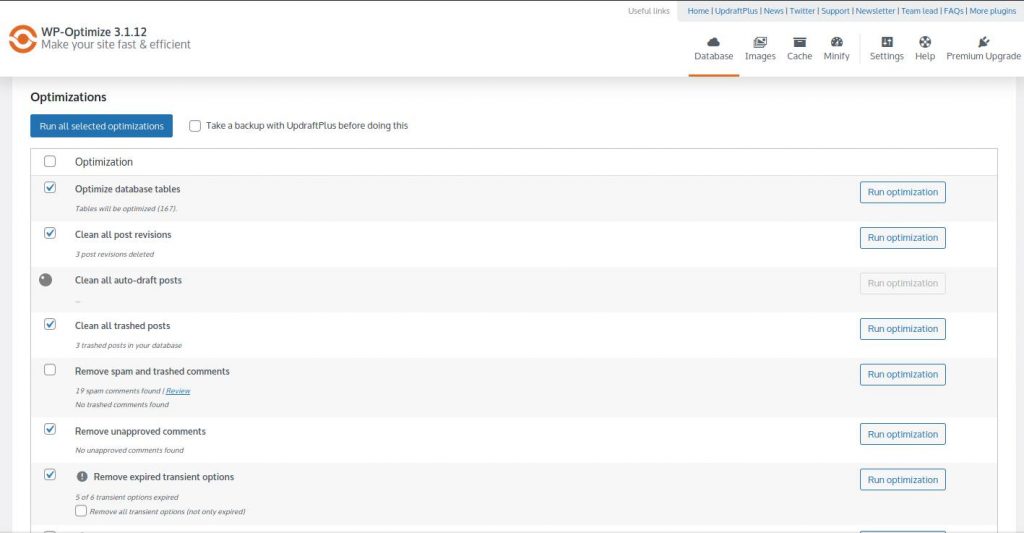
We suggest you optimize all parts of your database that show numbers beside it. If you got spam comments, delete them by clicking on the Run Optimization button on the right side.
Remove expired transient options is also an important database optimization function. Make sure you optimize it too by clicking on the Run Optimization button.
Press the Run Optimization button to every database function one after the other just to be on the safe side and not end up with any Database errors.
5. Backup WordPress Website Using Plugin
The WordPress plugin we are using here to back up our WordPress website is called UpdraftPlus Backups. This is a free plugin that can be downloaded from the WordPress repository. Well maintained backup plugin in our experience.
There are many other good WordPress plugins for the backup/restoration of your WordPress website. But we are using this plugin as it is free and gives a good result.
If you haven't used it already, download and install the UpdraftPlus Backups plugin. Go to your website's WordPress dashboard and find its settings page in Settings > UpdraftPlus Backups.
If you are using the plugin for the first time, then the plugin will help you by guiding you through the steps to set it up properly for backups of your website.
Go to the Settings page of the plugin. Put Files backup schedule as Manual. Also, put the Database backup schedule as Manual too.
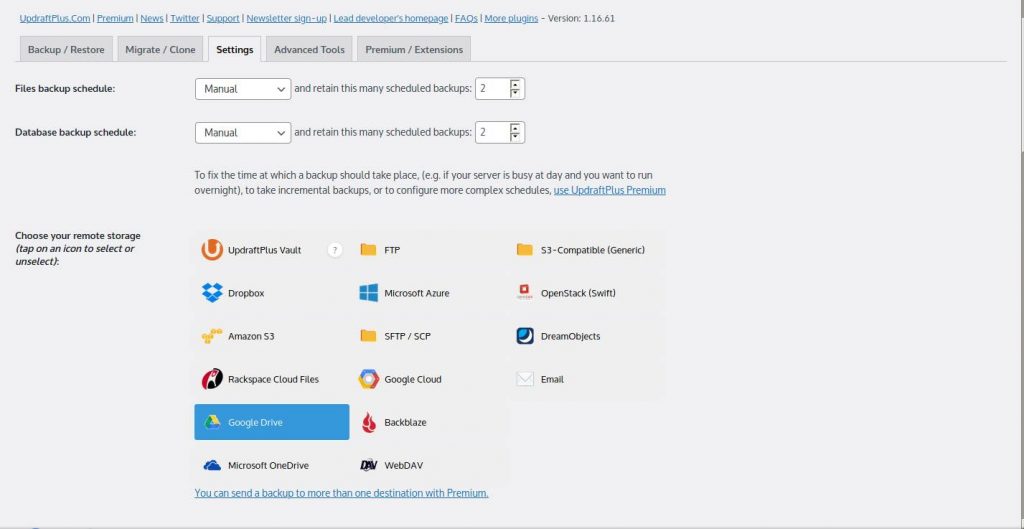
Then make sure the right option is selected based on your ease of use in Choose your remote storage option. We have used here Google drive.
Based on your selection of choice, the plugin itself will guide you with the steps that need to be performed for that specific choice to be set right.
You can also select here FTP, this way the backup files will be created in your website folder itself of your choice. Then you can use any FTP software like FileZilla and download these backup files to your computer.
We recommend Google Drive or any other online storage option to go with. This way you do not have to download the backup files to your computer and upload it again on the new server.
You can easily restore your backup files created here on your choice of cloud storage on your new server with the help of the same plugin. We will be doing this in further steps of this post.
Once you have set up the right Settings in this plugin. Go to the Backup / Restore tab.
Click on the Backup Now button.
Select all the options on the next prompted page. The last option says Only allow this backup to be deleted manually (i.e. keep it even if retention limits are hit). has to be selected as well.
So that in case if anything happens bad on your new server, you will still have this backup.
Backing up your website will take a few minutes. The time taken to backup your website varies based on the size of your website.
You can click on the show log link when the backup process starts. It will show you the steps it is taking to backup your WordPress website.
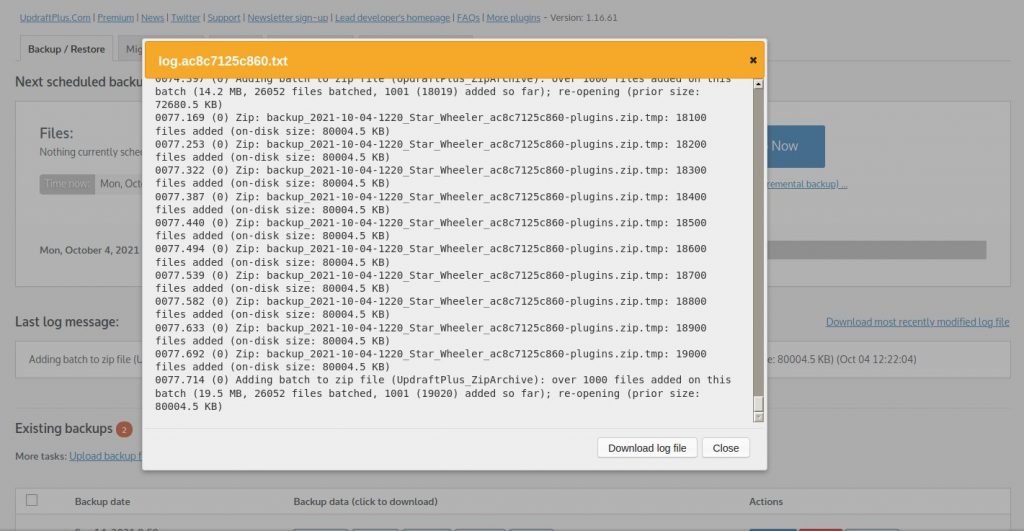
Once your backup is complete it is time to move to our new server. We will see that in our next step.
6. Restoring Cloudflare IP address To New Server Address
As we did at the beginning of this post, changing the IP address in the Cloudflare dashboard to backup the files from the old website server. We will now do the same but point in the other direction.
Open your Cloudflare dashboard again, go to the DNS tab of your website. Change the A address to your new Lightsail server where we installed a new WordPress copy in the previous part – 2 of this series.
7. Restoring The WordPress Backup Files on AWS Lightsail
Once you have pointed the right IP address for your domain to the AWS Lightsail server, it is time to go to the new WordPress dashboard.
Go to your website dashboard again be refreshing or opening a new tab in your web browser.
yourwebsite . com/wp-admin
You might be asked to log in again with the new admin details which you set when setting up the new WordPress website in part-2 of this posts series.
Once you are inside the dashboard of the new WordPress installation, go to Plugins > Add New.
Search for UpdraftPlus and install this plugin. This is the same backup plugin for WordPress we used in previous steps to backup our WordPress website.
If you have been following this tutorial step by step, then you should see a screen like this.
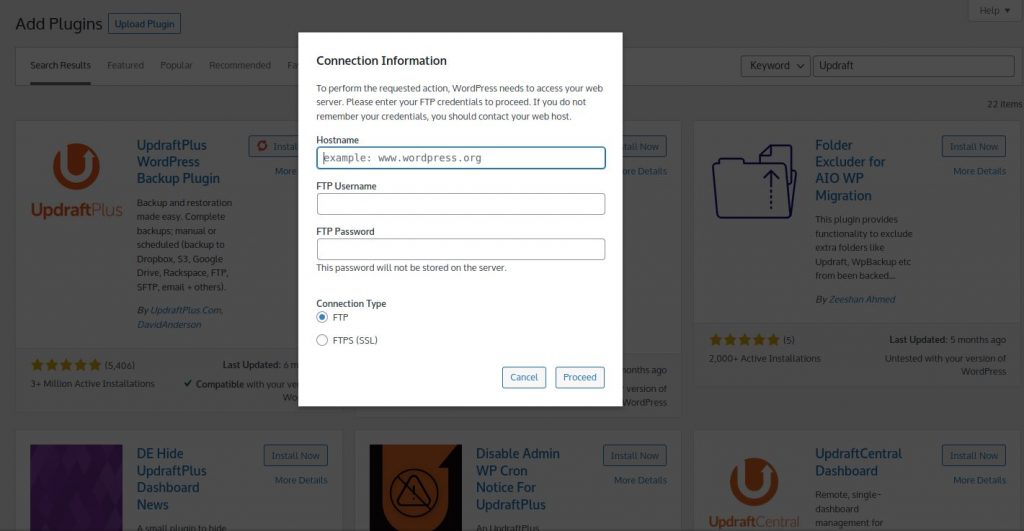
This is an extra added security placed when you install WordPress directly from the SSH console on your VPS.
This is an error caused by file security settings when you install WordPress using SSH. To help you prevent this error, we did the three commands in the previous post part-2 of this series.
sudo echo "define ( 'FS_METHOD', 'direct' );" >> /opt/bitnami/starwheeler/wp-config.php
sudo chmod 640 /opt/bitnami/starwheeler/wp-config.php
sudo chown bitnami:daemon /opt/bitnami/starwheeler/wp-config.php
When you put these commands, this error should not show up.
Now coming back to our website restoration process. The plugin UpdraftPlus WordPress Backup Plugin should install itself from the WordPress repository. Activate this plugin and go to its settings page.
In the settings page of UpdraftPlus Backups, go to the Settings tab. Select the same storage that you chose when backing up your WordPress files in Step 5 of this post.
Since we selected Google Drive for our storage, we will be selecting it again here.
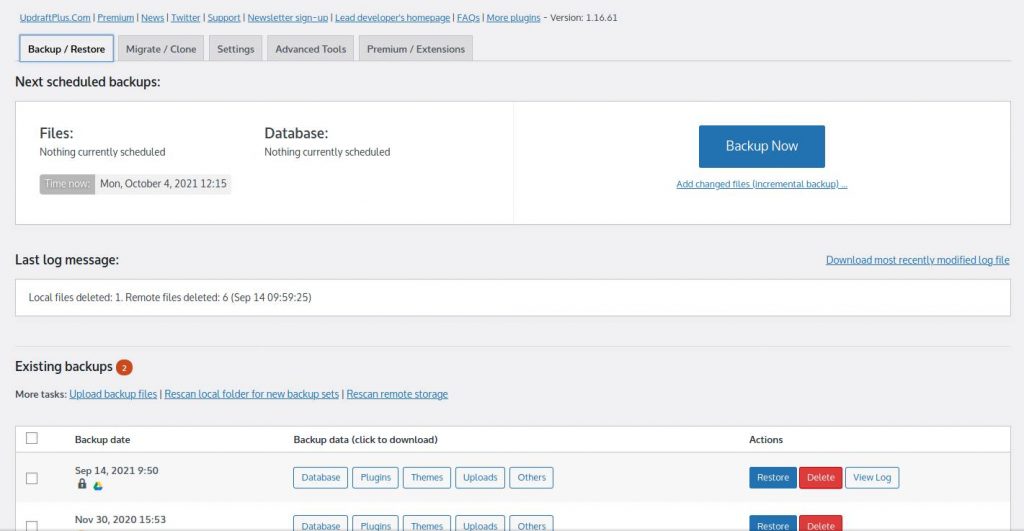
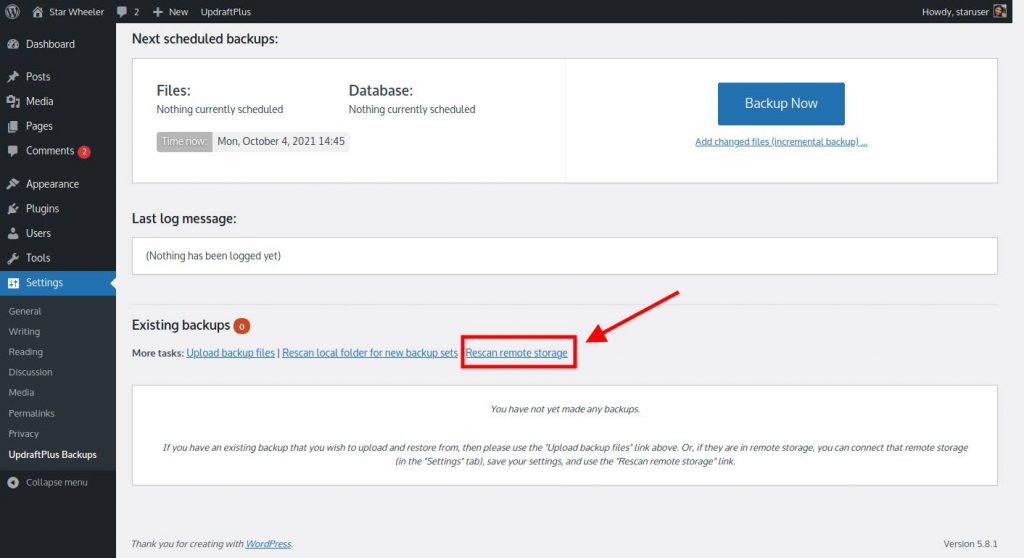
Once the settings for your selected storage are set right, you should now be back on the Backup / Restore tab of the UpdraftPlus Backups plugin.
Now click on the Rescan remote storage link down.
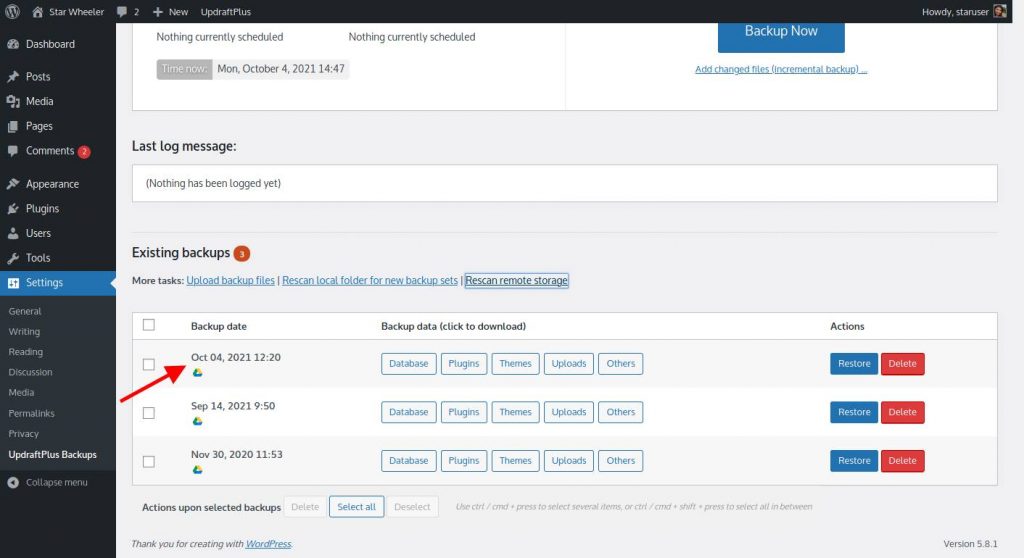
Now you should be able to see the list of all backups you have done. As you can see in the image above, you are now able to see all the latest backups we did for this website of ours.
Click on the Restore button to start restoring the WordPress website files to AWS Lightsail servers.
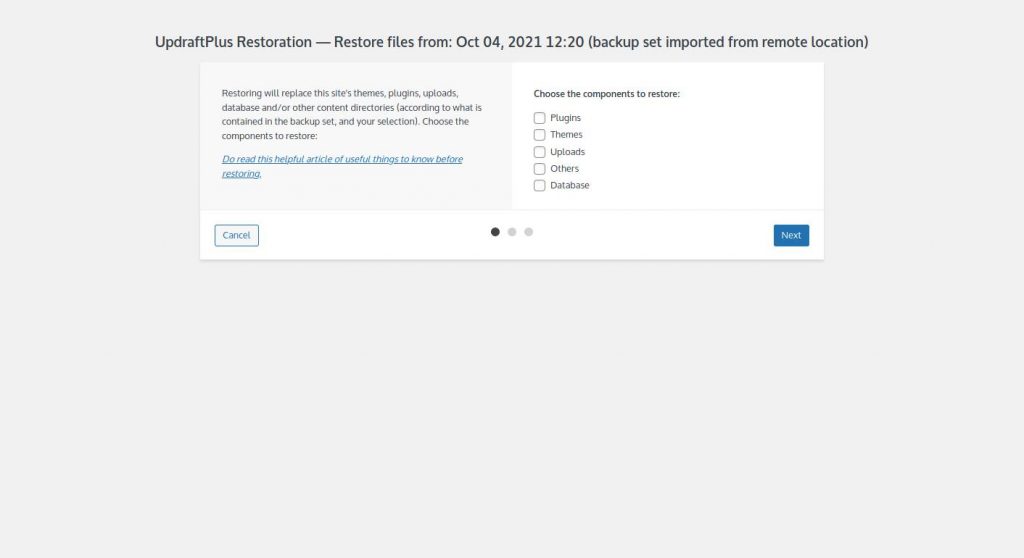
In the next screen, you are asked to select all the parts that you wish to restore from the backup. This is a very important step. It is irreversible if something goes wrong here.
Select all the options to restore WordPress Plugins, Themes, Uploads, Others folders to this new AWS server. Database option is a choice that has to be made carefully.
If you are selecting the Database to restore too, note that WordPress will prompt you to login again with the old website login credentials after the backup of this database.
We are going to select all the options here and press the Next button.
The restoration process has successfully started. If everything goes right without any errors then you should see this screen to make sure you still want a database restore.
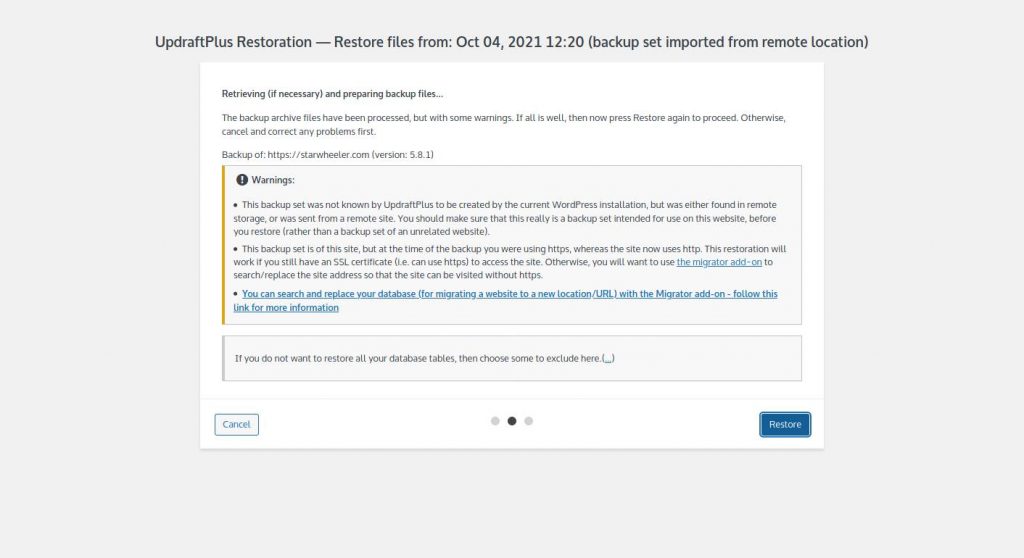
Like I said earlier, this is an important restoration. WordPress database restore is a very important part of any website.
Press the Restore button.
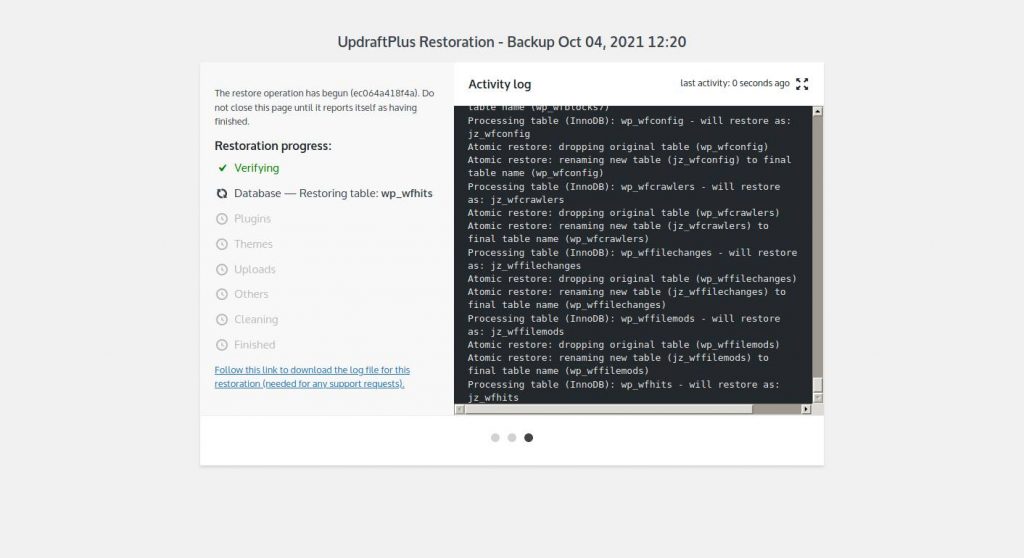
Once the database and all other files are restored, you should be prompted to log in again into your WordPress admin dashboard.
This login will open in a new tab. Once you log in, you can go back to the original tab where we restored the files and hit the refresh button in your web browser.
Once you log in, you should be able to see the WordPress admin dashboard from the old website. If this shows up, then congratulations, you have successfully restored your website from the old hosting server to this new AWS server.
You should also be seeing a notice on the UpdraftPlus Backups page that should look something like this.

This notice says that the UpdraftPlus plugin has put your already existing files here on this server before restoring old files with a suffix -old. When you press the Delete Old Directories file, this plugin will delete those files.
Since we only made a fresh install of WordPress in this tutorial, you can click on this button and remove the extra unnecessary files of WordPress.
And if you are using any plugins that depend on server IP, like Wordfence Premium, it might ask you to configure it again.

Click the Click Here To Configure button and set its settings right by following the instructions shown by the Wordfence plugin itself.
You have successfully restore your website on the new AWS Lightsail VPS server. Thanks to the free WordPress plugin UpdraftPlus and our expertise.
Error Too Many Redirects With WordPress
This error is very common when you restore a website. It is caused by the wrong URL in the database and the new URL setup you use when restoring your WordPress website.
This can be easily fixed. Check the domain name of your website if it is using HTTPS or HTTP when you restore the files.
Now go to the SSH of your server with AWS Lightsail. If you don't know how to do this, then refer to part-1 of our tutorial for this post series.
Enter these commands to enter into your MySQL.
mysql -u root -p
Enter password:
Next, select the WordPress website's database with this SQL command.
Use starwheeler_database;Now select the hope from wp_options with this command.
SELECT * FROM wp_options WHERE option_name = 'home';You should now see the existing value of your website domain name in the database. If it is different than what you have set up, then type this command with the right URL. The right URL is the restore setup page URL.
UPDATE wp_options SET option_value="http://starwheeler.com" WHERE option_name = "home";Similarly set the right options for siteurl value in the same database with these commands.
SELECT * FROM wp_options WHERE option_name = 'siteurl';
UPDATE wp_options SET option_value="http://starwheeler.com" WHERE option_name = "siteurl";
Remember to set the URL the same as the restore setup page which we did earlier.
Hope this tutorial has helped you move your website made with WordPress to another AWS server. We have also covered the possible error if encountered in this way.
In the next tutorial, we will be covering another aspect of this setup that will make your WordPress website faster to load using Amazon Cloudfront and other tweaks.
Let us know in the comments below if this tutorial helped you.
Read the other parts:
- Migrating WordPress Website To Lightsail On AWS – Part 1
- Migrating WordPress Website To Lightsail On AWS – Part 2
- Migrating WordPress Website To Lightsail On AWS – Part 4

I really like the backup part with the Updraftplus plugin. I used Dropbox option as Google Drive is not a suitable option for me. Worked like a breeze.
I faced too many redirect error. Your commands were helpful. THanks