LinkedIn is an important social network to connect with many other businesses and work professionals worldwide. It is quite popular in English-speaking countries.
A lot of professionals have found their job opportunities through LinkedIn. Also, many HRs and companies are always posting job openings here.
If you have a good-looking profile here on LinkedIn and good recommendations, then landing a good job is easy. It is also a good thing to showcase your work through a website.
The best reliable CMS for a website is WordPress to write your blog and showcase your work. If you can also showcase your LinkedIn profile badge or card along with your work or posts, it creates a good impression for the recruiter.
Unfortunately, showing your LinkedIn badge on WordPress is not an easy process. The official way of doing it doesn't work every time.
In this post today, we have discussed both the official way and our way of creating LinkedIn profile badges. Our way of creating a LinkedIn profile card always works.
What is a LinkedIn Badge or Profile Card?
A LinkedIn badge is an online badge for your LinkedIn profile. It shows your present job role in your company along with your education and profile picture.
image
This LinkedIn profile card looks very decent when used on websites. If you write posts like me on different websites and want your visitors to get connected with you on LinkedIn, then this profile card is very helpful.
LinkedIn badge once clicked will redirect your visitors to your LinkedIn profile. If any recruiter finds it suitable for their company, then he/she might get in touch with you.
There you have a new job opportunity. You might decide on this new opportunity later but more importantly, now you have a new way to showcase your skills. Post on your blog and get hired by placing a LinkedIn badge at the end of it.
Creating A LinkedIn Badge “The Official Way”
This version which we call “The Official Way” means the recommended way by LinkedIn itself. Here the code for getting the profile card is provided by LinkedIn itself.
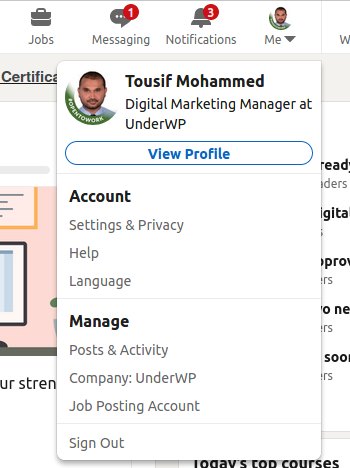
Log in to your LinkedIn account and go to your profile.

Click on the View Profile button. You will be directed to your profile in its Edit mode.
Now click on the Edit public profile & URL link on the right side.
A new tab will open up. Scroll down and you will see on the right side a section called the Public Profile badge.

Click on Create a badge button. This will redirect the page where you can find all the instructions for creating a LinkedIn profile badge.
On the Public profile badge builder page, you will find two steps to be followed to get your profile badge show on your website page. Copy the first code from this page.
This code has to be posted in either the footer of the page or theme you are using for your WordPress website. We use Elementor in most of our WordPress designs.
Go to your Elementor designs and if you have designed the footer of your website with Elementor, then open the design using Elementor.
Search for the Custom HTML widget in the search on the left side.
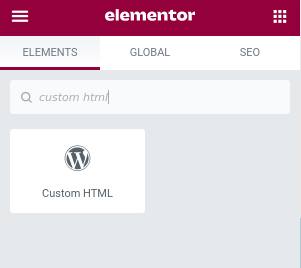
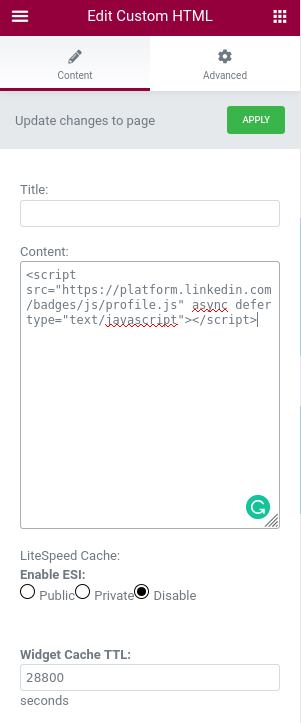
Paste the content of the code copied from LinkedIn to the Content section of the Custom HTML widget. No need to put the Title or any other sections in this widget.
Now you can update your page and every page of your website will load this code. This is a bad practice but still recommended by LinkedIn.
Now you can go to any part of your website pages or posts where you want to showcase the LinkedIn member profile. Edit this page or design with Elementor.
Again use the Custom HTML widget from the Elementor widgets and drag it to any suitable place of your website to show the LinkedIn profile.
Go to the LinkedIn profile badge builder page and copy the code from Step 2.
Come back to your website where you are using Elementor to edit your page. Put this code in the Custom HTML widget you just placed in the above step.
According to LinkedIn, once you update the above code on your page, it should start showing up your badge on that page. But in most of the cases, we found that it will just show your name and link to your LinkedIn profile.
In some cases, the above steps lead to showcasing a successful LinkedIn profile card on your WordPress website. But most of the cases we found that the LinkedIn profile badge is not working with the above code.
This is why we have got the second method for you. With this second method, you will be able to successfully create the LinkedIn badge without any errors.
Creating A LinkedIn Badge “The Unofficial Way”
A LinkedIn badge is a HTML/CSS design. The same code is provided by LinkedIn as we have seen above.
Now in this “Unofficial Way,” we are going to create the LinkedIn profile badge by using Elementor and its designing features. No HTML/CSS knowledge is required for this as we have tried to keep it as basic as possible. But if you can understand CSS and Elementor, then our steps will show you that we do not use any external JS or CSS files and creating them by purely HTML/CSS designing.
This method will take 20 – 30 minutes of your time. Let's get started on creating a LinkedIn profile card with Elementor.
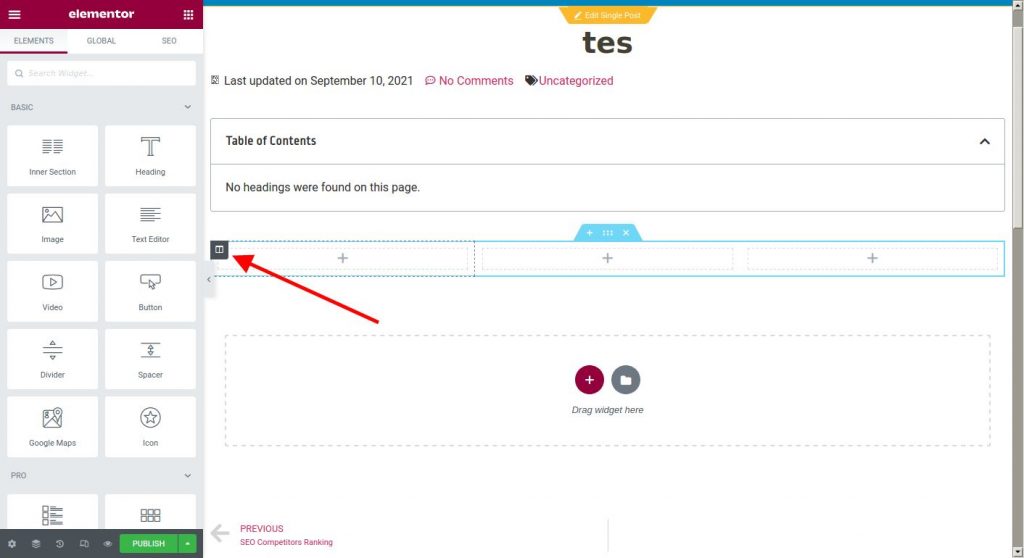
Open up the page where you want to show your LinkedIn badge. Add a section to it with three columns.

We will be creating a Large size badge here. You can later adjust the size according to your choice.
Select the column and click on its edit options.
In the Layout tab which is the default tab, put Widgets Space as 10. Go to the Style tab in the left column. In the Background tab, click on the color. Select the completely black color or input the values #000.
On the same page now select the Border tab in the Elementor Edit Column. Put Border Radius as 10.
The image was taken before the final changes. Do not make the values 20 but only 10 as said above.
Now go to the Advanced tab, in the padding section remove the Link Values Together by clicking on the link icon. It should have a white background which means the values are not linked to each other.
Put 12 on top, 16 in right, 12 in the bottom, and 16 in left options of Padding.
Update your page. Now go back to Elementor widgets by clicking on the top-right icon.
Select the Image widget once all the widgets are visible to you. Drag it to our LinkedIn badge column. Now we can select our profile image and set its settings.
After you select the image, go to Image Size and select the Custom option. Put 56 in both width and height place and press the Apply button.
Select the Left option for Alignment. Now go to the Style tab from the top section of the same edit page of the Elementor image edit page.
At the bottom of this Style tab, find the Border Radius option and input value 30. After this, your image will look like this.
Go to the Advanced tab and remove the Link values together icon and make its background white. Put the value 10 in the Top option. Rest everything remains 0.
Update your post. One part of your LinkedIn page is done.
Now click on the icon of the widget on the top right corner and come back to Elementor's widgets collection. Drag the Heading widget in our LinkedIn profile card widget below the image we just placed.
Input your profile name in the Title. Put your LinkedIn profile link in the Link option. Select Medium option in the Size. Select H3 in HTML Tag option. And select Left in the Alignment.
Next, go to the Style tab from above and select a white color or #fff in Text Color. In Typography select Family as Roboto, Weight as 600, Decoration as Underline. Update the page and it should look like this.
In the Advanced tab above which is located just on the side of the Style tab, go to the Padding section. The Link Values Together icon has to be deactivated. This icon looks like this.
This icon is deactivated, will be having a white background. Then input 4 in the Bottom option and update the page. Our second part is now complete.
For the third part, just duplicate the name we created above. Put your mouse pointer on top of your name of LinkedIn profile badge and right-click, you will see the option of Duplicate.

Click on the Duplicate option and create a copy of your name. Edit with the right details in its Title by putting your job role and your company name. In the Link option, keep it blank. Size is Medium, HTML Tag will be H4. In the Styles tab, only a few changes had to be made. In the Typography option, select Weight as 400, Decoration as None.
In the Advanced tab go to the Padding section and make the Bottom option from 4 to 0.
Our third part is also finished now. Going to the fourth part.
Similar to the above steps, duplicate the above-created professional name.
In the Title option, put your Company Name with a “|” and your graduation college name. The real LinkedIn badge from LinkedIn itself links to your Company Name and your College name. You can also do that here but I will not recommend it. To do that, input this code:
UnderWP | Jawaharlal Nehru Technological University Put the Link section blank. Size is to be selected as Small. With this our third step is complete. After the third step, it will look like this.
Now, for the fourth step go to the Elements widget selection page by clicking on the top right gallery icon. Select the Button widget and drag to the LinkedIn badge below the Company and University Name we just created.
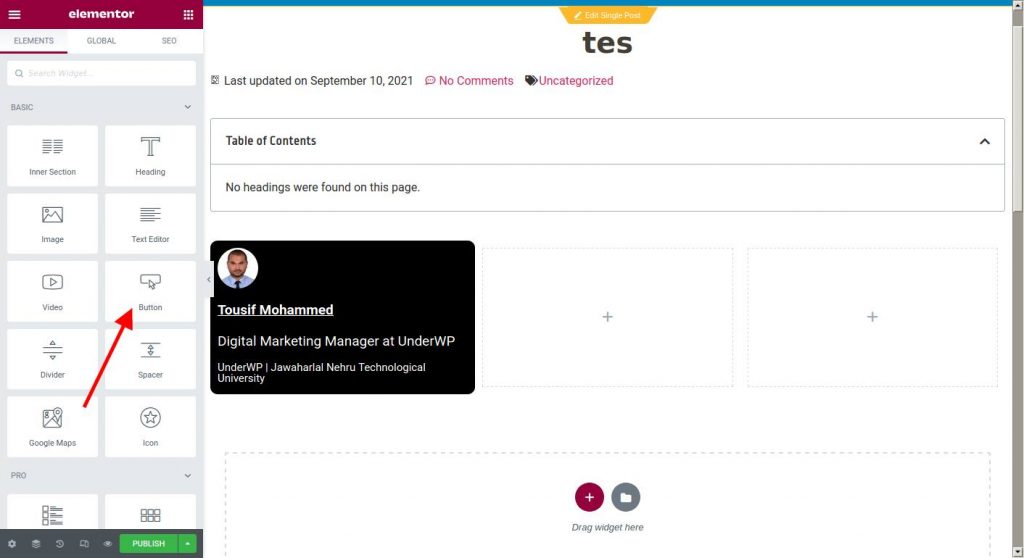
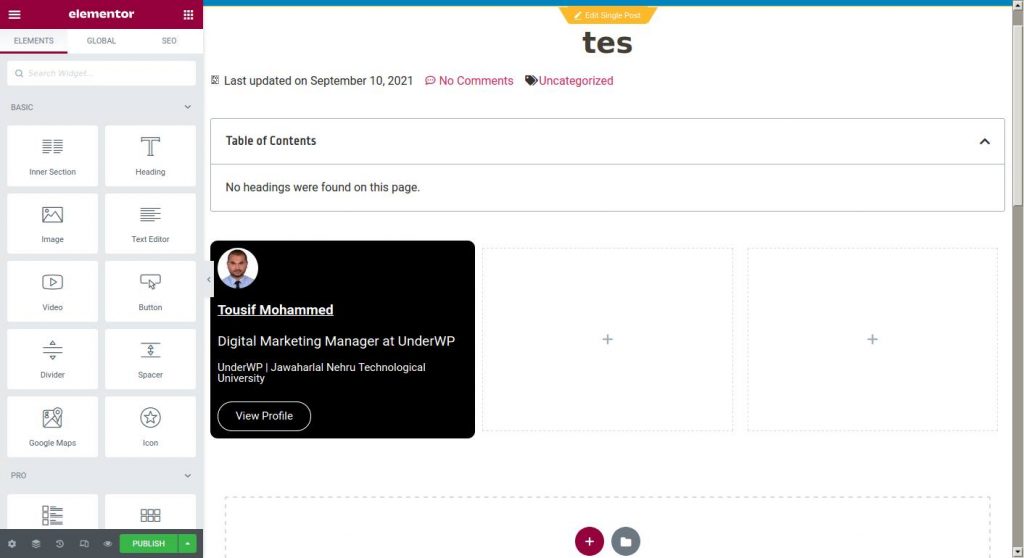
In the Edit Button options page, put Text value as View Profile, Link as your LinkedIn profile link.
Go to Style tab, in the Color option set transparent or #FFFFFF00. Border Type is Solid, Width to be set 1, Border Radius as 20, Typography as Roboto.
Now we will start the fifth step, the final step for creating ourselves the LinkedIn badge for the WordPress website. This is a tricky part which is why I have kept it in the end.
Go to the Elementor Widgets gallery, select the Image widget and place it above the profile image of ours we created in the first step of this tutorial.
For your ease, we have got the LinkedIn logo for both dark and light themes here. You can download it from these links.
LinkedIn Logo for White and Dark Theme on Imgur
For this post we are creating a dark theme LinkedIn badge, so we will use the white font LinkedIn logo.
In the new Image widget we just placed in the badge, Choose Image has to be uploaded with the LinkedIn logo. Select Image Size as Full. Alignment as Left.
Go to the Advanced tab, in the Margin option remove the Link Values Together option by clicking on the link icon. Put the values for Top as -12, Right -16, Bottom -8, and Left as -16. Yes, we are using negative values here to get the same effect as the official LinkedIn profile card.
Now in the Padding section remove again the Link Values Together option by clicking on the link icon. Put the values for Top as 10, Right as 10, Bottom as 10, and Left As 16.
Now go to Background Tab below. Select Background Type as Classic. A new option will open up by the name Color. Select color as #38434F for dark theme and #e9e5df for the light theme of the LinkedIn profile badge.
And the last setting to be set right here is in the Border tab. Put Border Radius values for Top as 10 and Right as 10.
Update the page and your LinkedIn badge is ready to be placed on your WordPress website.
Congratulations! You have successfully created your LinkedIn profile badge without any external scripts as LinkedIn suggests on their official page.
Now you can place this LinkedIn profile badge in any part of your post and get the required attention for it from your website visitors. Placing it at the end of the article of your blog posts is recommended.
Here is the LinkedIn profile card we created above. You can see that we did it practically and wrote this tutorial for our viewers.


A little lengthy process with Elementor but in the end, it’s worth it. Thanks for the tutorial.